
l
RWBY Scythe V2
RWBY Scythe V2
Above is a video of RWBY scythe deploying.
ll
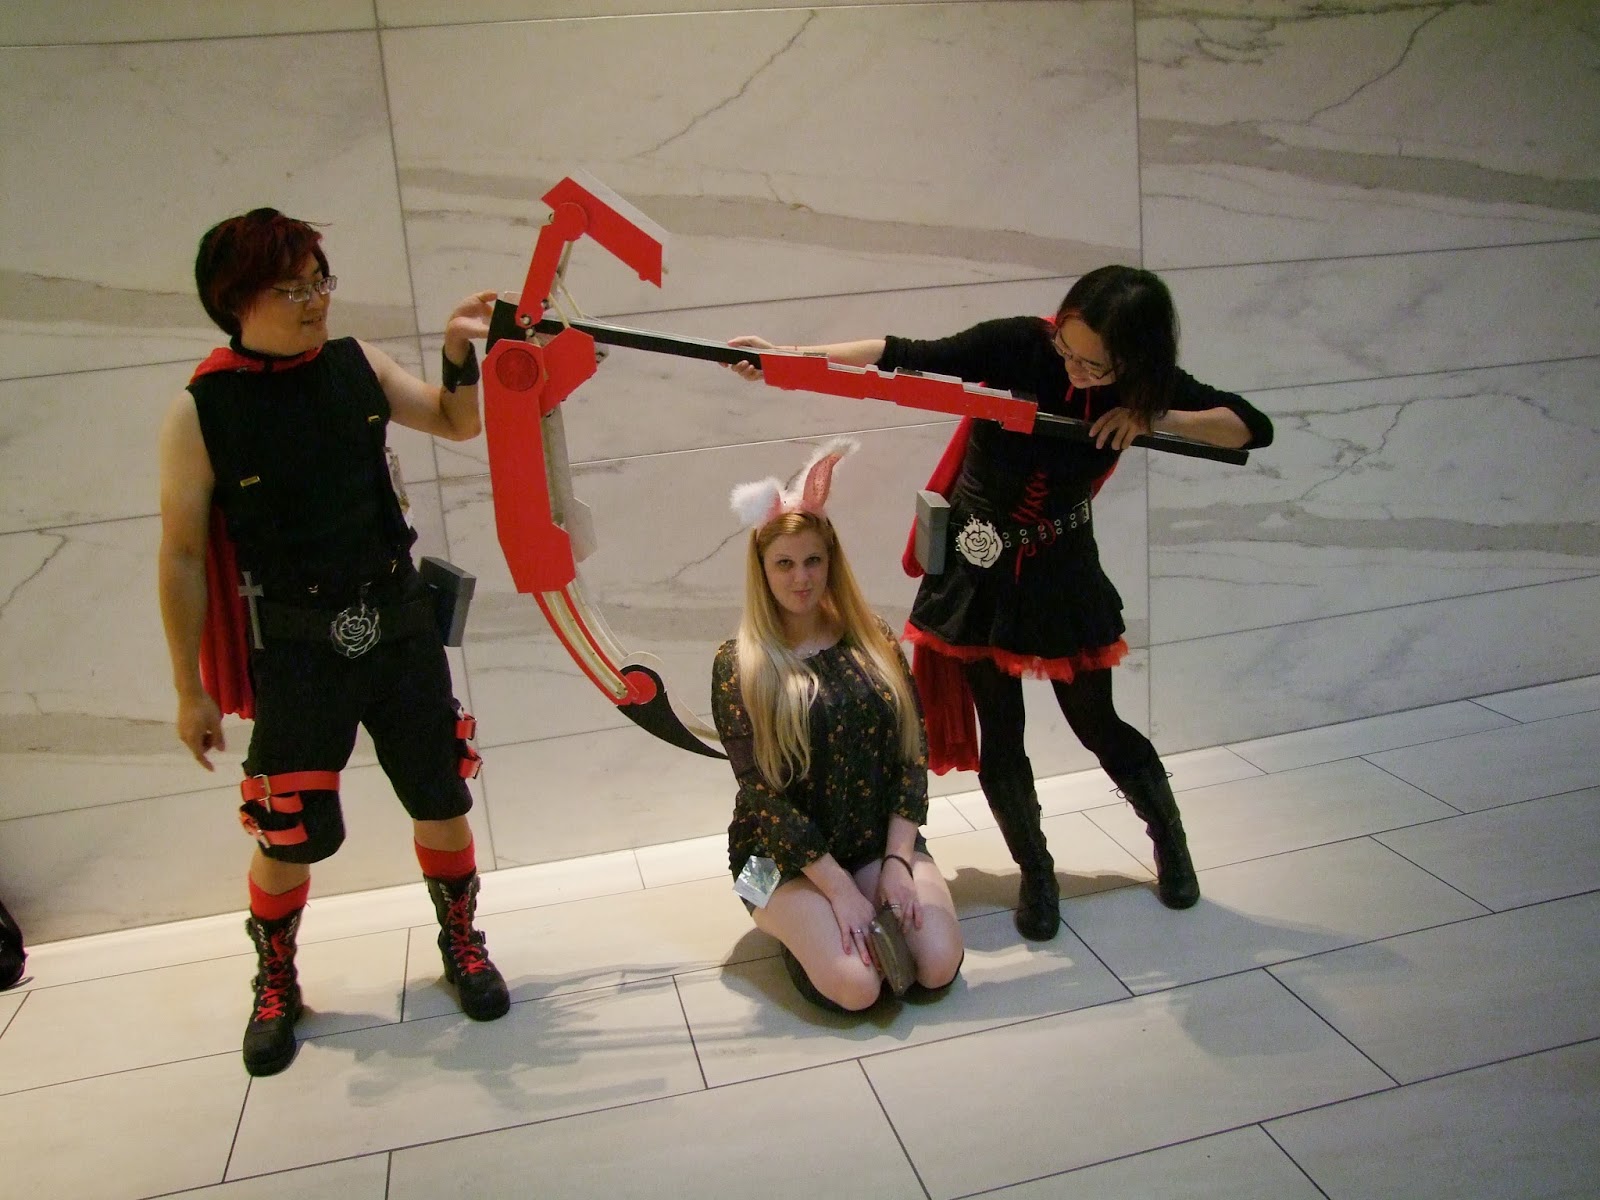
Dragon Con 2014 fun

Ruby and her male counterpart!

Shenanigans!
Left to right: Me (Ruby), Alison (Blake),
Charles (Charles on a little electric bike), Jamo (Jayce).
Dragon Con 2014 fun
Ruby and her male counterpart!
Shenanigans!
Left to right: Me (Ruby), Alison (Blake),
Charles (Charles on a little electric bike), Jamo (Jayce).
CAUTION: LONG POST AHEAD!
Click below to read more!
-
l
-
The weeks leading up to Dragon Con 2014, RWBY Scythe version 2 spent roughly 75% of that time in design, and 25% in actual making. Not a great ratio, especially when work tends to cut into the majority of your available time just when you need extra time. But somehow, somehow, version 2 pulled through, only through sheer doggedness and the incredible support from friends. Namely, this guy - ETOTHEIPIPLUSONE. Go check out his site! He also cosplayed the male counterpart to my Ruby!
Like last time, there's a whole slew of improvements to be learned from this version, but I'll go through what I did and talk about those points as they come along.
--Backbone--
So first up, I reworked the body extension from the last version. Instead of the steel slides from before, I made my own rail system from Home Depot aluminum pieces. (All the components I used for what I termed the 'Backbone' can be found on this Home Depot page.) Much lighter, much cheaper, and if I mess up - very easily replaced.

I had 2 angle bars framing a flat bar, allowing it to slide.
Sliding aluminum on aluminum isn't great, but for the
small distance that I needed it to go, it would suffice.

To prep them for the next step, I marked out holes along the
clamped angle pieces and drilled them out. Since, to connect
these pieces, I was going to use rivets.What are rivets?

^These things.^
They look like little fairy swords, haha.

The 'sword blade' looking part goes into the rivet gun and the other
'sword hilt' looking part gets pressed into the pre-drilled holes from earlier.

And then, squeeze the trigger (using a LOT of force if you're rather weak like me)
until your hear a POP. Handling the rivet gun was like using one of those
hand-strengthening grips. Except.... my hand was too small for the rivet gun.
So I just-- ...double handed it. >u<;
...Yes, I felt very weak.

After the POP, the 'blade' part will come loose and what's left is your rivet! Magic.

For a flush surface, just take that to a belt sander.

The other end jut out a lot more than I anticipated. But I had nothing
planned for that side so it wouldn't have interfered anyways.
Good to note for next round if I decide to rivet again, though.


Countersinking the middle bar, prepping for threading the cable/string.

This is the whole assembly of the middle backbone rail bar,
separated in their respective layers. They measure 22" across.

Assembling this took a peculiar order of operations, but nonetheless doable.
I didn't think to factor in the order of assembly - I'm glad everything still
turned out ok in the end! Next time, that'll be accounted for...

Nuts for spacers.
I actually drilled out the threads so they were essentially just fat washers, haha.

Off-screen, I would make 2 more pairs of the angle bits for the bottom rail.

Charles helped me speed-drill some stand-offs...
(and by speed-drill, I mean using a handdrill to speed drill--
...Ninja machining, I suppose.)

And voila! The completed rail system, measuring 22".
I would later swap the red thread for heavy duty multifilament fishing line -
clear, thin and sturdy.
--Linkages--
I tend to do a lot of my designing and thinking in 2D. What helped me a lot was drawing up cross sections and profiles of the scythe to make guides for the locations of the parts. After transferring the sketch ideas into digital programs, I had to enlist the help of Charles for CAD work this time around. Reason? I bit off a bit more than I could chew at work and was now suffering some consequences in terms of time management. It definitely hurt a lot, but I kept doing what I could - Gotta keep going, right? More hours in a day please!
The linkages in Version 2 were a repeat of Version 1, just enhanced, more mathematically thought out and incorporating a chain actuator. At least, that was the plan. The chain drive didn't quite make it, but more on that later.

^A simple guide I made for reference on the location of parts.^

Constrained linkage sketch.
Yes, math is useful. Do your homework, guys!

Lovely CAD work, thanks for Charles!
I provided the linkage design, but the CAD was his.
I became his client in a way, hehehe~

The open form of the unfolding mechanism.

Routed fiberglass and delrin pieces!
Charles introduced me to this type of material - garolite.
Light, sturdy, but not very flexible - Just what I needed.

There was still work to be done after the pieces were routed:
Like drilling through the holes...

...more drilling through holes...
(...Don't be like me - cut your nails before machining!)
(Also, be sure to be safe when drilling - clamp when you can!)

...and tapping through some of those drilled holes.
(Also, on the side - drilling and tapping delrin is like drilling through butter.
So smooth~~)
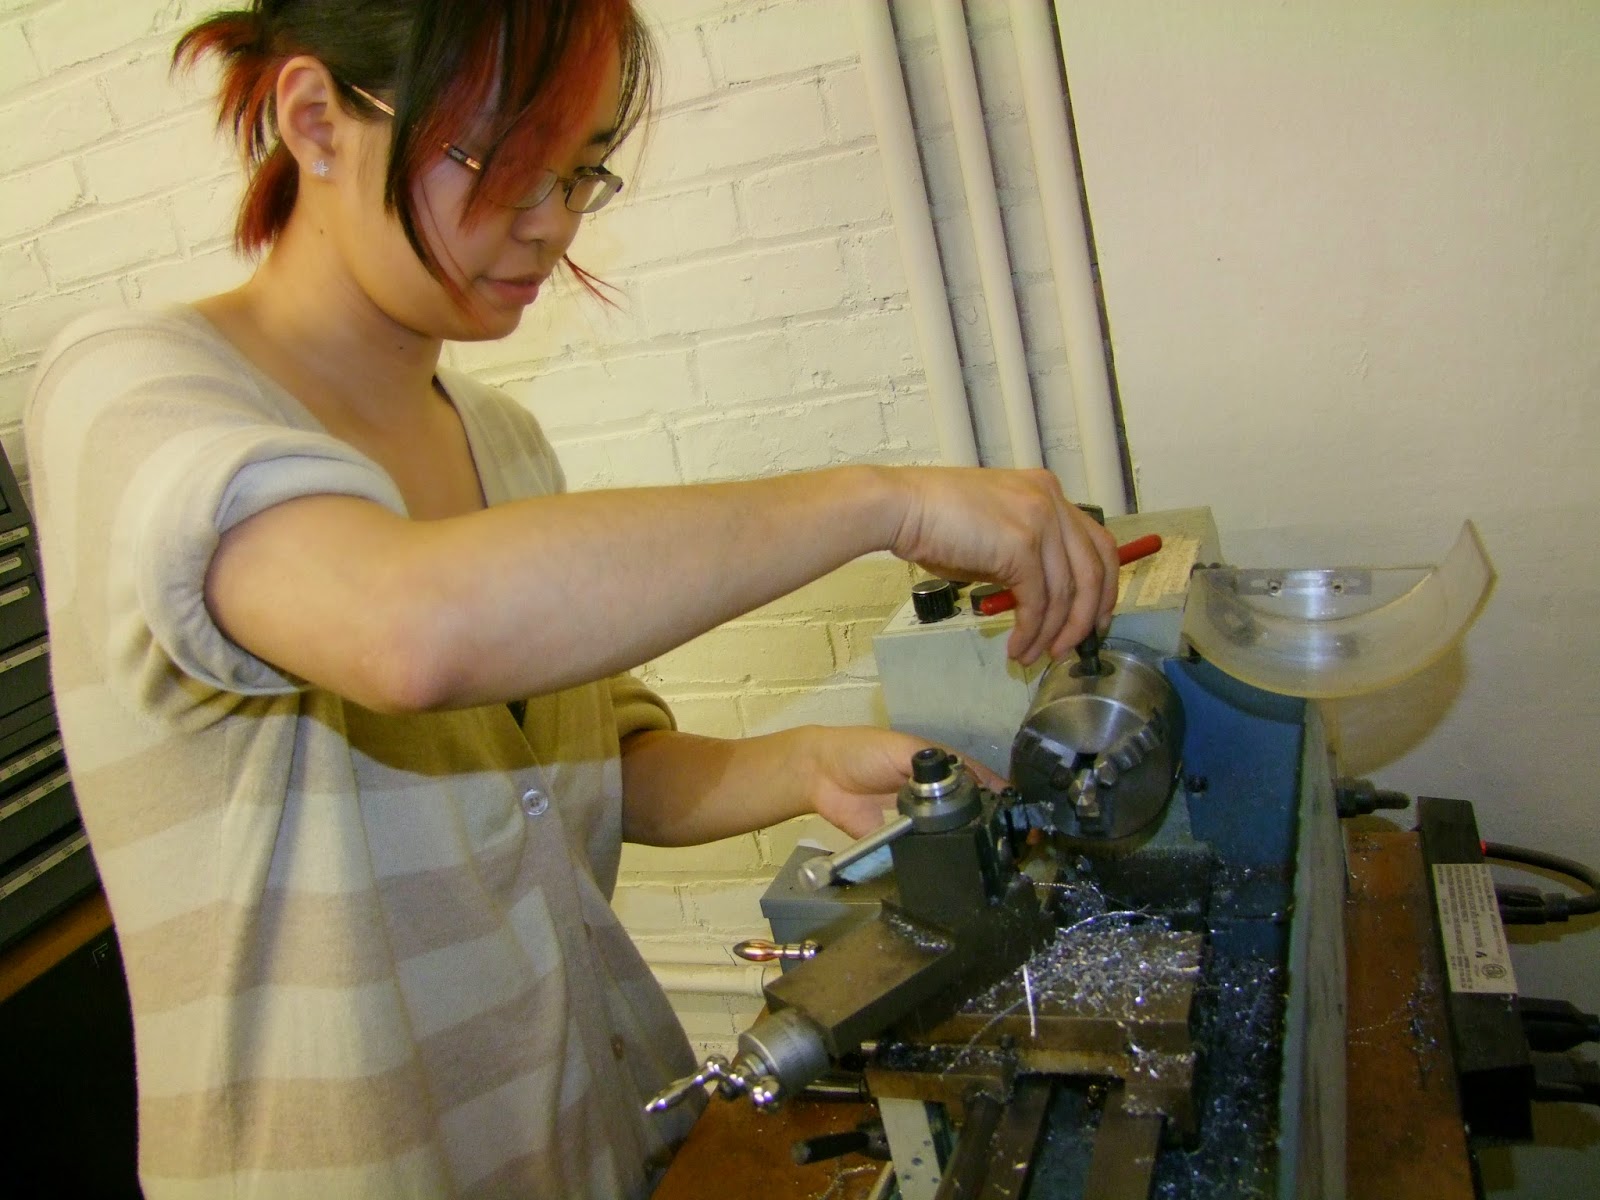
The last thing I did before we headed down to Atlanta was make
joints for my linkages. So here I am, late at night, using the lathe
to turn about these joints. Though I wasn't hurt, I would still not
recommend doing this. Any amount of precision work should be
saved for daylight and after rest!
But time wasn't on my side, so I spent a good amount of hours at night before
we left to turn out these little cartridge-like joints. There were a lot of joints. xux/

Here you can see my scribbly numbers and diagrams.
Since there were a lot of joints, I had each set numbered in bags later,
which really helped speed (and make less confusing) the assembly part later.

^Closeup of my scribbly notes.^

Who took this picture? ....I did. 8D;;
You probably shouldn't do the same. Both hands on the lathe, kids!

And then lastly, I pried apart a red street-wand thingy I got at a hardware store.
I didn't think through this part of the exterior aesthetics at all, having been too
engrossed in how the scythe moves.
Next time, I plan to make the exterior look more polished.
--Assembly--
The Tuesday before Dragon Con, the four of us (Charles, Adam, Jamo and I) hauled our cosplay and robots down to Atlanta the Tuesday before Dragon Con. Since the roadtrip was going to eat up a day of travel, we wanted ample time to rest (and finish the prop, in my case). There, at the Invention studio, I assembled scythe, all pieces still in tact from the ride down.

Getting ready! You can see all the duct-taped joints next to the rail.
Each little set was labeled with a diagram to ease assembly.

These super-awesome planetary gears are the work of Charles!
They were one-shot 3D-printed - head over to his blog to find out more!
This planetary gear was supposed to convert a larger amount of linear motion
to a smaller amount of angular motion. When grouped with a sprocket, the chain
would actuate the sliding piece of the scythe arm. Or, that was the plan, at least.
Again, the chain will be addressed momentarily.

Just for the record, the above piece is the sliding piece I was mentioning in my
previous comment. The fiberglass was a stubborn material to work with.
There was still a lot more finessing I had to do via sanding or drilling,
and though the material yielded, it took some work to get it to do so.
Not to mention, working with fiberglass is risky enough -
don't breathe it all in or rub your eyes!
The result, a less-than-smooth sliding piece, even with the linear bearing.
Thank you Matt from GATech for helping me obtain those bearings!

^Here's Charles helping me sand out a larger diameter using the circular sander.^
Thanks to the Invention Studio and all the ULI's who helped me access to the shop.

Fully assembled backbone and linkages with chain.
Unfortunately, the chain couldn't be synced, and they
kept slipping off their guide tracks.

In addition, the retraction mechanism for the chain wasn't thought out at all,
and the last minute elastic solution didn't jive with the current setup.
Decision? The chain was just causing headaches and frustration,
so it was tossed out. RWBY scythe V2 would have to be manually
actuated this time again.
I have to admit, I was plenty sad about that. But there wasn't much time to lose,
so I set about making the poster coverings that night.

These poster pieces would definitely have been laser cut if
I had the time or resources. But since I didn't have a shop-on-wheels,
I went about hand-cutting them out with Exacto's.

The idea was that these outside coverings wouldn't be structural, but as I learned
through a bumpy car ride, not enough hot glue was bound to cause issues anyway.
Good thing there was a 'Cospitality' Lounge at the Con, so I could fix that.
Next version's aesthetics would definitely have to be durable enough
to survive Con-conditions.
--Retrospective--
I spoke for a few minutes at the Rapid Prototyping in Cosplay panel about the scythe, and I got the question afterwards of "How did I even begin to think about making this?"
How did I? In retrospect, the answer was obvious - I started with some research in the scythe's animation, breaking it up into chunks of motion, and then started brainstorming mechanisms for those systems. But when I started, it did feel like a daunting task. Especially when the creator Monty decides to use impossibly-thin structures and somehow bypasses the Conservation of Mass (artistic license, I suppose?). But at the time that guy asked me, I really didn't have a good answer. I remember giving him some answer pertaining to "learning, doing, and learning again", but in a way, that was only part of it.
So how did I begin?
I began on paper. Wrong or right, I just got out my ideas. Once they were in sight, it was easier for me at least to figure out which idea to pursue, and which idea to scrap. Plus, the trace-ability of your thoughts is now thoroughly documented, even if in jumbles and scribbles at first.
Though I know others go straight to digital programs, either CAD or 2D programs, I would highly suggest starting on paper first. And jointly, to help summarize your learnings from project to project, I would really suggest making a blog as well, influenced as I am today by a few other maker-bloggers. It really forces you to reflect on what you did, why you did it, and what you really want to improve on next.
So here are a few pictures from my making-of sketchbooks. (The rest of the pages can be found in the video at the end of this section.) I hope they'll help inspire some of you who are thinking about doing something like this, and answer the question someone asked me.
So how did I start?
By making a mess of sketches, and learning to swim my way up.

The V2 rail system.

Organizing layers.

Extension ideation.

Nomenclature.
Below is a flipthrough video of some of my making-of sketchbooks.
--Conclusions--
If I had to choose, the top two requirements for Version 3 would have to be:
1) Single motion actuation.
2) A more polished exterior.
The same linkage design would persist, and I'm thinking maybe I'll try servos this time...

-
ll
-
Dragon Con 2014 felt really busy this year - a lot of stuff to do, and not enough time for anything else, including checking out the Exhibitor hall, Artist Alley, or any other panels (other than the ones Charles, Adam and Jamo were hosting). Namely because, we were mainly all there for the Robot battles event.

Uberclocker and 12 o' Clocker sitting pretty before their rounds.
Our crew did really well this time around, with Charles winning the 30 lb category and the 30 lb rumble, and Jamo winning the 1 lb category and coming in 2nd after Charles in the 30 lb category. My role during the battles was more in pit crew and media duties, but I got a chance to get up on stage to teach Kelly Lockhart (the announcer) how to say "Moe moe kyuun~" complete with the cat paw. Why? Because he reads everything the builders write on their app sheets, and Charles wrote that on Uberclocker's. Oh, my bad - "The Uberclocker of Haruhi Suzumiya." xD
There's a whole bunch of videos of the matches already up, thanks to Mike Jeffries, and can be found HERE. I'd recommend watching the robot rumbles if not anything else. Me? I always enjoy matches with Uberclocker! :D
Despite all the con-rush and the irritable Atlanta heat though, I think Dragon Con was worth the blood, sweat and tears RWBY scythe put me through.

Like this. This just made my day.
The little girl was so gung-ho about holding RWBY scythe, it was adorable~
Apparently she had been sneaking peaks from behind the wall we were standing next to
before we even realized she was there.
(She then allowed us to pet her Unicorn stuffed animal as thanks.)

SRIRACHA MAN. Charles and I were very stoked.

A group photo! I totally understand the flip-flops, Toph. *fistbump*
BUNNY. Don't hurt!

The very badass Jamo (Jayce) and Alison (Blake).
Fact: All the props in this photo could transform!

Found a Ruby!

And another Ruby!
Charles (Dude Ruby) took both our scythes. o3o
We were not amused.
(Actually, no - I was still amused.)

A final shot of me in my RWBY getup.
-
Final Thoughts
-
I, for one, don't have an answer yet, but I know what makes me happy right now, and I have a clearer picture of what's driving me too. I'm starting to better understand my weaknesses and strengths, in addition to what type of person I am.
In that regard, this RWBY project that's spanned a year plus some now hasn't been just a prop project. It was truly a personal project. Personal in the way that it's dug under my skin, allowed me to see who I was and who others around me were. Personal in the way it's made me think about who I wanted to be. And in the end, it gave me a much better appreciation for what I can do, what I could do, and what I had to stop doing.
I'll be working on Version 3 after this, and truthfully, I'm rather excited to see how I'll develop with it along the way.
Thanks for bearing with me through the long post! Onwards to the next project!
Hi my name is curtis I love this I am trying to do a cosplau for ruby and been looking for a scythe that transform and I seen urs plz email me maybe u can help I wood love to get help one makeing one for me for my next con
ReplyDeleteMy email is dark_angel_crimson22@yahoo.com
Plz emile me as n as u can plz I dont want to take ur work with out u liting me so plz email soon thx
way to go, cynthia! awesome project!
ReplyDeleteBest one I have seen I'm working on a spring assisted one and I love the mechanisms. I can't believe you used planetary gears for some of the action. Very cool. I would bronze and expose that. Its very cool.
ReplyDeleteI'm sure I'll have a ton of questions in the coming months. Please Get ahold of me.
Jake
Jggthp@gmail.com
This comment has been removed by the author.
ReplyDeletehey I found your ruby scythe on youtube and would like to build one similar to it. adding a pulley/spring setup to fold and unfold it. I was wondering if there is a way I could get the file for the gear setup that you used I loved the perfect smooth look that it gave it really was art work. email is austinnkt95@gmail.com. thank you for your time
ReplyDelete